Table of Contents
- Introduction
- What is the Heartbreak Memories Edit?
- Why This Trend is Exploding in 2026
- Breaking Down Every Design Element
- Complete AI Prompt (Copy & Paste)
- Step-by-Step Generation Guide
- Using Different AI Tools
- Editing Tips for Realism
- Common Mistakes to Avoid
- Manual vs AI Editing Comparison
- Pro Tips for Premium Results
- FAQs
- Conclusion
Introduction
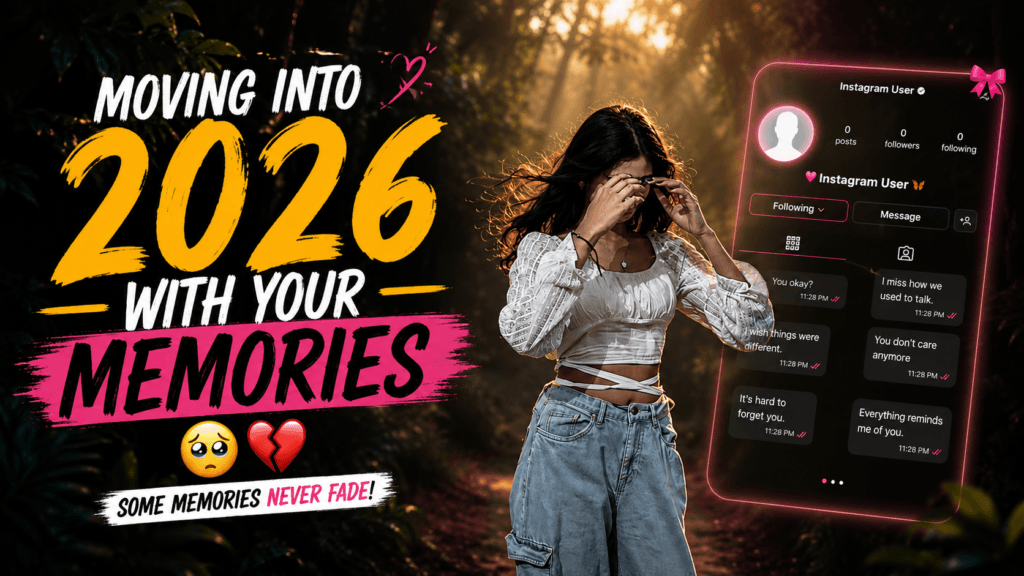
Your Instagram Reels feed is full of them — moody, cinematic black-and-white photos with broken heart emojis, misty forest backgrounds, and that haunting “Moving into 2026 with your memories” text overlay.
The Instagram Heartbreak Memories Edit is one of the biggest aesthetic trends of 2026, and everyone from beginners to content creators is trying to recreate it.
At Bihar Preset, we’ve been testing this trend hard. And here’s what we found: it looks complicated, but it’s actually dead simple once you understand the prompt and the editing principles behind it.
Whether you’re new to AI image generation or you’ve already tried a few prompts and got mediocre results, this guide walks through the entire process — from the exact prompt to common mistakes to pro tips for making it look genuinely cinematic, not just moody-for-the-sake-of-it.
Let’s break it down.
What is the Instagram Heartbreak Memories Edit?
The Heartbreak Memories Edit is a stylized, cinematic photo edit that combines several key elements:
- Black & white or heavily desaturated color grade (low saturation, high contrast)
- Moody forest or nature background (dark, slightly blurred, atmospheric)
- Instagram profile interface overlay (username, profile frame, icons)
- Emotional text (e.g., “Moving into 2026 with your memories”)
- Small emojis (broken heart, sad face, placed subtly)
- Film grain & dust particles (for authenticity)
- Soft glow & cinematic lighting (not harsh, carefully balanced)
- Chat overlays (faded message bubbles in the background for storytelling)
The final result looks like a still frame from an emotional indie film — not a regular selfie or portrait. That’s exactly why it crushes on Reels, Shorts, and TikTok. It feels like a story, not just a photo.
Why This Trend is Exploding in 2026
Emotional Resonance
Everyone has experienced heartbreak, nostalgia, or a “moving on” moment. The theme connects instantly with viewers.
Cinematic Quality
AI tools can now produce film-like lighting, grain, and mood that used to require professional editing software (Photoshop, Lightroom, DaVinci Resolve).
Low Effort, High Impact
One good prompt + 5 minutes = Instagram gold. No Photoshop skills needed.
Algorithm Boost
Aesthetic, emotionally-toned content gets longer watch time on Reels. Longer watch time = more reach. Platforms reward this.
Personal + Artistic
Because it uses your photo, face, and username, it feels unique to you — not a generic filter. That authenticity is what makes it shareable.
9:16 Vertical Format
Perfect for Stories, Reels, and mobile screens. No awkward cropping.
Breaking Down Every Design Element
To recreate this edit properly, you need to understand what each visual element does and why it matters. Let’s go through them:
1. Instagram Profile Frame
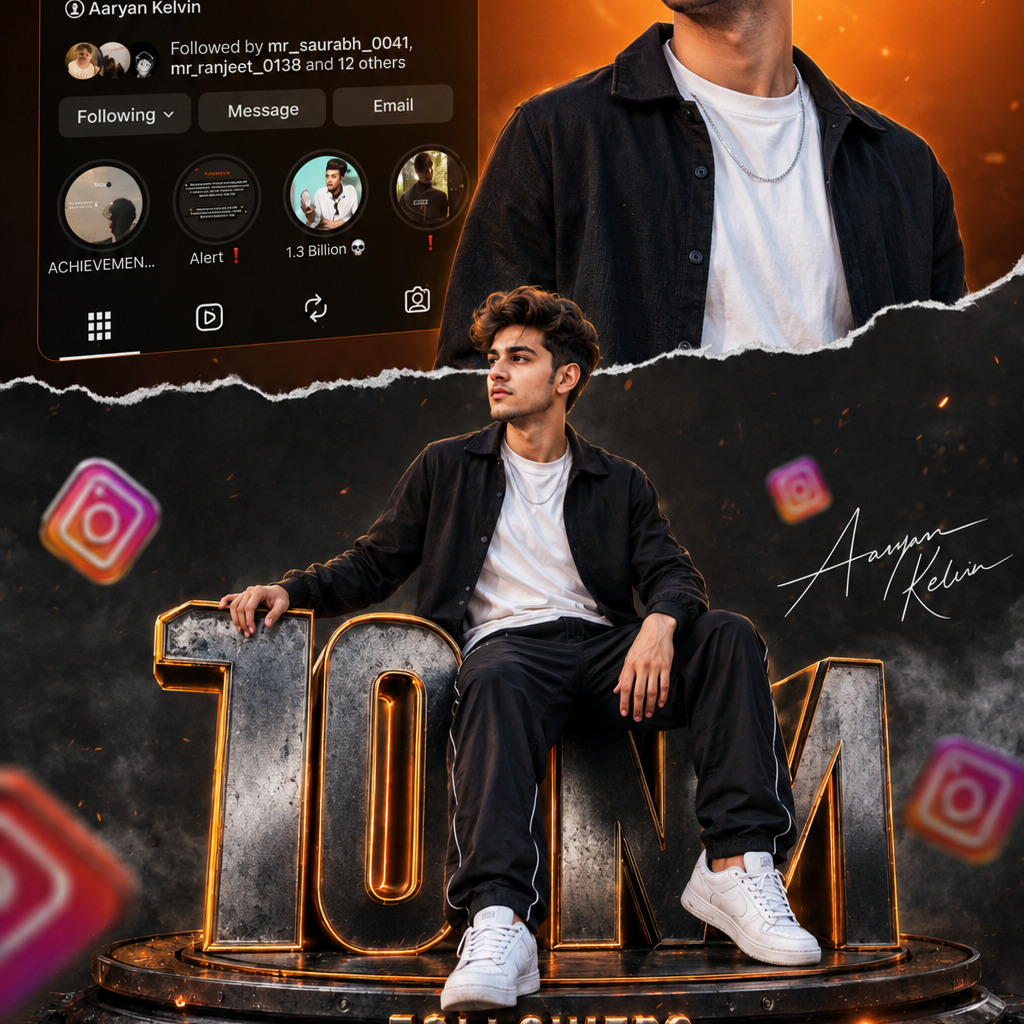
Includes a mock Instagram profile layout (username, follower text, profile card) so the image looks like it’s part of the app itself rather than a standalone photo.
2. Default Profile Picture Style
Many versions intentionally use a plain, default-style profile pic — this keeps focus on emotion, not glamour.
3. Black & White Cinematic Look
Removing color shifts all attention to light, shadow, and texture. This single element is what makes it look like a movie still.
4. Forest Background
Misty, slightly blurred, atmospheric. Adds depth and a sense of isolation that pairs perfectly with heartbreak or nostalgia.
5. Text Overlay
“Moving into 2026 with your memories” — should be subtle, thin serif or handwriting-style font, placed in a corner (not center).
6. Broken Heart Emoji
Small, slightly transparent. Reinforces emotion without overwhelming.
7. Sad Emoji
Often paired with chat overlays to suggest an unspoken text conversation.
8. Film Grain
Light texture that mimics old film cameras. Gives authenticity, non-digital feel.
9. Dust Particles
Floating dust or light particles add atmosphere and depth, especially with backlighting.
10. Soft Glow
Gentle glow around light sources (sunlight through trees) softens B&W contrast.
11. Chat Overlays
Blurred or partially visible text bubbles suggest backstory without revealing content.
12. Moody Lighting
Low-key with strong shadows = introspective, emotional tone.
13. High Contrast
Strong light-dark separation keeps B&W striking, not flat.
14. Viral Thumbnail Framing
9:16 or 4:5 ratio, subject slightly off-center for candid feel.
Complete AI Prompt (Copy & Paste This)
Use this exact prompt in ChatGPT, Gemini, or your AI image generator:

Girls prompt:

Step-by-Step Generation Guide
Step 1: Prepare Your Reference Photo
- Take a clear, well-lit photo of yourself (or your subject)
- Soft daylight or window light works best
- Portrait mode or natural depth preferred
- Good facial detail (AI will preserve this)
Step 2: Open Your AI Tool
- ChatGPT (with image generation enabled)
- Google Gemini (image creation feature)
- Or any image-to-image editor you have access to
Step 3: Upload Your Photo
- Click attachment/image button
- Upload your reference photo
- Make sure it’s clearly visible in the chat
Step 4: Paste the Prompt
- Copy the entire prompt from above
- Paste into your AI tool
- Adjust the username/text if desired (optional)
Step 5: Generate
- Hit send/generate
- Wait 30-60 seconds for the AI to process
Step 6: Review the Output
- Check for: natural skin tone, sharp facial detail, balanced B&W contrast
- Verify: profile overlay is visible, text is readable, emojis are present
- Look for: film grain is subtle (not overwhelming), glow is soft
Step 7: Iterate If Needed
If the result is too dark, reply with:
“Make the face brighter while keeping the mood dark”
If grain is too heavy:
“Reduce film grain to 15% — keep it subtle”
If it looks too AI-generated:
“Preserve natural facial texture and skin detail”
Step 8: Download & Post
- Right-click → Save image
- Upload to Instagram Reels, Stories, or Shorts
- Add appropriate caption (breakup, moving on, nostalgia theme)
Using Different AI Tools
ChatGPT (Recommended)
✓ Best image-to-image consistency
✓ Preserves original face well
✓ Responds well to detailed cinematic descriptions
✓ Generates in 1-2 minutes
How to use: Upload photo → paste full prompt → request adjustments if needed
Google Gemini
✓ Strong at atmospheric/lighting effects
✓ Good forest/nature backgrounds
✓ Quick generation (30-45 seconds)
How to use: Mention “soft backlight through trees” clearly in prompt, since Gemini responds well to specific lighting direction
Other Image Generators
⚠️ Text-to-image only tools may struggle to preserve your face
✓ Image-to-image tools work best (they use your photo as reference)
Avoid: Pure text-based generators for this trend — they won’t capture your likeness accurately
Editing Tips for Maximum Realism
✓ Start with clear, well-lit reference photo — AI amplifies quality issues, doesn’t fix them
✓ Ask for “preserved facial detail” in your prompt — prevents over-smoothing of skin
✓ Request grain & dust as separate layers — too much texture hides facial features
✓ Specify “natural, slightly overcast forest lighting” — avoids artificial sunset tones
✓ Mention “medium-dark contrast” — prevents crushed blacks that hide detail
✓ Fine-tune contrast manually after — use Lightroom preset or mobile editor if AI output feels too flat or harsh
✓ Export at highest resolution — so grain and detail don’t pixelate on Instagram
Common Mistakes to Avoid
❌ Too Many Text Overlays
Username + quote + chat bubble + emojis = visual clutter. Keep it minimal.
❌ Wrong Aspect Ratio
Square images get awkwardly cropped on Reels. Use 9:16 or 4:5.
❌ Excessive Grain or Blur
Makes face unrecognizable. Subtle is always better.
❌ Overdone Glow Effects
Artificial-looking instead of cinematic. Less is more.
❌ Flat Contrast
Black-and-white without proper contrast looks dull, not moody. Ask for “high contrast.”
❌ Skipping the Prompt Iteration
First try rarely perfect. Regenerate 2-3 times and pick the best.
❌ Poor Original Photo
Blurry or badly lit source = blurry or badly lit output.
Manual vs AI Editing: Which is Better?
| Factor | Manual Editing | AI Editing |
|---|---|---|
| Time | 30-90 minutes | 2-10 minutes |
| Skill Level | Intermediate-Advanced (Photoshop/Lightroom) | Beginner-friendly |
| Consistency | Depends on your skill | Reliable with good prompts |
| Control | Pixel-level precision | Prompt-dependent (moderate control) |
| Cost | Free (self-edit) or $$ (outsource) | Free-low cost |
| Best For | Professionals + full creative control | Quick social content + beginners |
Bihar Preset’s take: AI editing for social content wins on speed. Manual editing wins on precision. Hybrid (AI base + manual polish) = best results.
Pro Tips for Premium Cinematic Results
✓ Shoot near a window during soft daylight for natural base lighting
✓ Keep your pose simple & slightly candid — matches the nostalgic theme better
✓ Use muted, thin fonts for text (not bold or blocky)
✓ Test 2-3 prompt variations and pick the one where your face looks most natural
✓ Export at highest resolution so grain doesn’t pixelate
✓ Add caption intentionally — “moving on,” “new chapter,” “nostalgia hits different” gives context
✓ Try different emojis — doesn’t have to be broken heart (stars, moon, clock work too)
✓ Adjust text position — off-center, lower third often looks better than centered
✓ Request “slight motion blur” in prompt — adds cinematic feel
✓ Post during evening/night — moody content performs better when people are reflecting
Frequently Asked Questions
Q: What exactly is the Heartbreak Memories Edit?
A: A cinematic, black-and-white style photo edit combining emotional text, emojis, moody lighting, and Instagram profile overlay to tell a nostalgic or heartbreak story in one frame.
Q: Which AI tool works best?
A: ChatGPT and Google Gemini are most reliable because they support image-to-image editing and preserve your actual face while transforming the background/mood.
Q: Do I need Photoshop?
A: No. Most of this can be created with AI alone. Basic mobile editors (Lightroom app, Snapseed) can help with minor fine-tuning afterward, but not required.
Q: Why does my AI version look fake?
A: Usually excessive glow, over-smoothed skin, or unnatural grain. Reduce effect intensity and ask the AI to “preserve natural facial detail.”
Q: What’s the best aspect ratio for Instagram?
A: Vertical 9:16 (Reels/Stories) or 4:5 (Feed). Both fill mobile screens properly without awkward cropping.
Q: Can I use my real Instagram username?
A: Yes, but consider privacy. Some creators use a stylized or partial handle instead of their full username for public sharing.
Q: Does this only work for heartbreak?
A: No. Same technique works for nostalgia, friendship, travel memories, “new year new chapter” themes. Just change the text overlay and mood.
Q: How long does it take?
A: About 5-10 minutes per edit, including prompt adjustments and reviewing variations.
Q: Can I use this for other themes?
A: Absolutely. The cinematic black-and-white technique adapts to any emotional theme — loss, growth, reflection, celebration.
Q: Should I regenerate multiple times?
A: Yes. Generate 3-4 variations and pick the one where your face looks most natural and authentic.
Conclusion
The Instagram Heartbreak Memories Edit looks complicated, but it’s actually very achievable once you understand the design elements and how to prompt for them correctly.
Every detail matters: the forest background, film grain, subtle chat overlays, broken heart emoji, high contrast — they all work together to create that cinematic, emotional feel that performs so well on Reels and Shorts.
The secret? Start with a good prompt + a clear reference photo + willingness to iterate 2-3 times. Most people quit after the first try. Don’t. The third version is almost always better.
Ready to Create?
Save this prompt. Use this guide. Test it out. And most importantly — experiment with your own variations. The best edits are the ones that feel authentically yours, not copies of someone else’s trend.
For more AI photo editing guides, cinematic prompts, and trending aesthetic breakdowns, bookmark Bihar Preset. We publish new content weekly.
Your heartbreak memories edit is literally one prompt away.
Related Reading
- 2000+ Free AI Prompts for ChatGPT, Gemini & Midjourney
- Best Free Lightroom Presets for Cinematic B&W Editing
- Viral AI Photo Trends: Complete 2026 Guide
- AI Eye Matching Prompt: Couple Photos with ChatGPT
- Instagram Reel Aesthetics: Design Guide for Creators
Bihar Preset | AI Photo Editing Made Simple
Follow us for daily AI photo prompts, cinematic editing tutorials, Lightroom presets, and trending aesthetic breakdowns.
Leave a Reply